You can build solid, good-looking patio furniture yourself in a single weekend using standard lumber, a few basic tools, and about $100–$300 in materials depending on the piece. The key is picking a beginner-friendly design, cutting to a proper cut list, assembling with outdoor-rated fasteners, and sealing every surface before the weather gets a chance to work against you. This guide walks you through every step from planning to long-term maintenance, so you end up with furniture that actually lasts instead of wobbling apart after one rainy season.
How to Build Patio Furniture: Step-by-Step DIY Guide

Maren Grady
13 May 2026
Pick a design and measure your space first
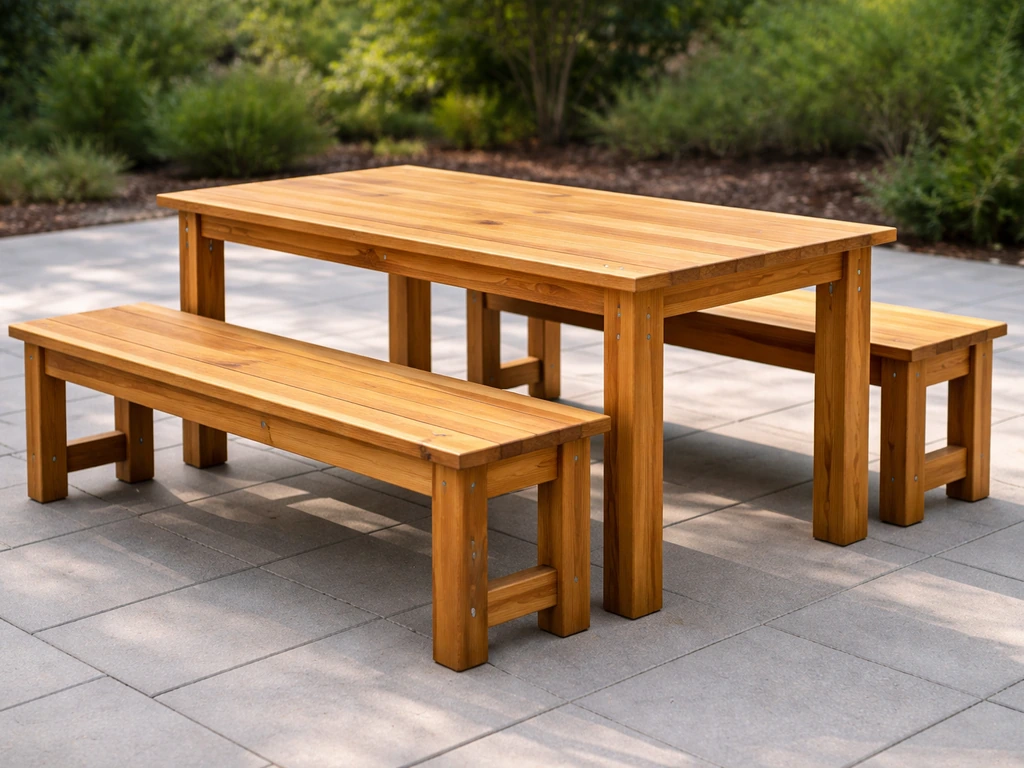
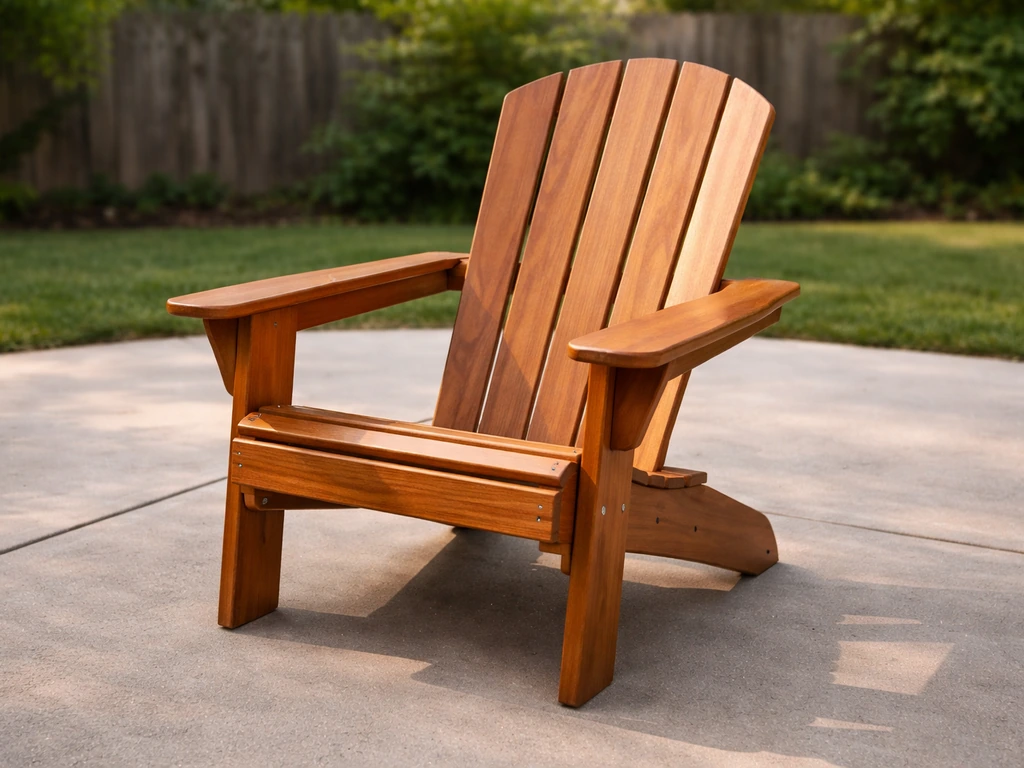
Before you buy a single board, figure out what you're building and whether it will actually fit. The most beginner-friendly outdoor pieces are Adirondack chairs, simple bench seats, and slab-style dining tables. These involve mostly straight cuts, minimal joinery, and forgiving designs that don't require tight tolerances. If you want a full patio set, consider tackling chairs first to get comfortable with the process, then move to a matching table. If you specifically want to focus on how to make wooden patio chairs, use these same material and build steps and adapt the dimensions to your comfort needs. To turn the ideas here into a full dining setup, follow a matching patio set build plan that scales from your chair workflow to table and seating full patio set. Related projects like building a complete patio set or wooden patio chairs follow the same core principles covered here.
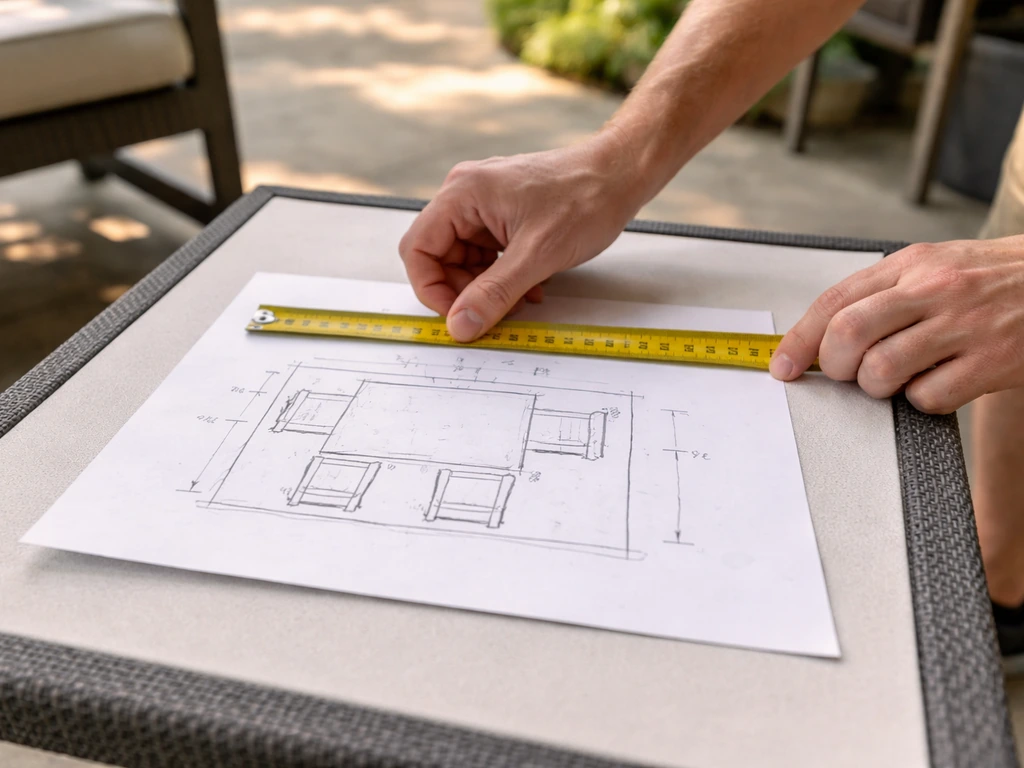
For a dining table, the standard comfortable height is 28 to 30 inches. Your chairs should have a seat height of 17 to 19 inches, leaving roughly 10 to 12 inches of clearance between the seat top and the underside of the tabletop. Chairs are typically 22 to 26 inches wide and deep. Write those numbers down and measure your patio before finalizing anything. A good rule: leave at least 36 inches of walkway around each piece when chairs are pulled out. Sketch a rough overhead view of your space with dimensions and place your planned pieces in it on paper before cutting anything.
- Outdoor dining table height: 28–30 inches
- Dining chair seat height: 17–19 inches (leaves 10–12 inch clearance under tabletop)
- Chair width/depth: 22–26 inches
- Minimum walkway clearance around furniture: 36 inches
- Sketch your patio to scale before committing to dimensions
Choose outdoor-safe materials, hardware, and finishes
Lumber
Not all wood holds up outdoors. Your best budget-friendly options are pressure-treated pine, cedar, and redwood. Pressure-treated pine is the cheapest and most available, typically $1–$3 per linear foot, and it resists rot and insects well. Cedar costs a bit more but is lighter, smells great, and takes finishes beautifully. Redwood is premium and not always available everywhere. Avoid standard untreated pine or whitewood for any part that will be exposed to rain or ground contact. For furniture that stays elevated and covered seasonally, cedar is my personal preference. For anything with legs that might contact soil or a damp deck surface, pressure-treated is the safer call.
Fasteners
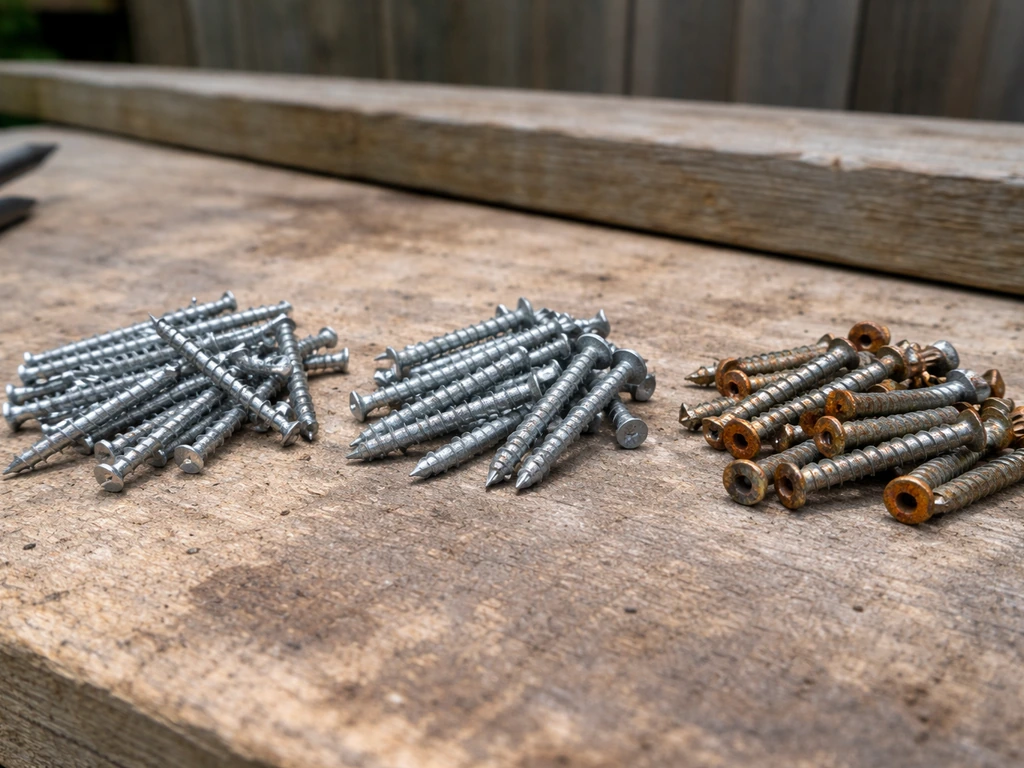
This is where a lot of DIY builds fail early. Standard zinc-plated screws will rust and stain your wood within a season. For outdoor furniture, you need either hot-dipped galvanized (HDG) fasteners with at least a G90 coating, or stainless steel grades 304 or 316. This is actually required by IRC Section R317.3 when using pressure-treated lumber, not just a recommendation. One important note: don't mix stainless and hot-dipped galvanized fasteners in the same joint. When two dissimilar metals are in contact in a wet environment, galvanic corrosion accelerates and your galvanized fastener will fail faster than if you'd used either type consistently throughout. Pick one and stick with it. Stainless steel pocket-hole screws (1-1/4 inch works for most 3/4-inch stock) are a great option for Kreg-style joinery on outdoor projects.
Finishes and sealers
For sealing, spar urethane is one of the best all-around choices for outdoor wood furniture. It's formulated to flex with the wood as it expands and contracts with temperature changes, and it provides strong UV and moisture protection. Oil-based spar urethane like Varathane Ultimate or Olympic Spar Urethane gives excellent results. Penetrating exterior wood oils like Ready Seal or Thompson's WaterSeal are also solid options, especially for end grain and leg bottoms where absorption is highest. Avoid interior polyurethane outdoors, it cracks and peels fast.
Tools and supplies checklist
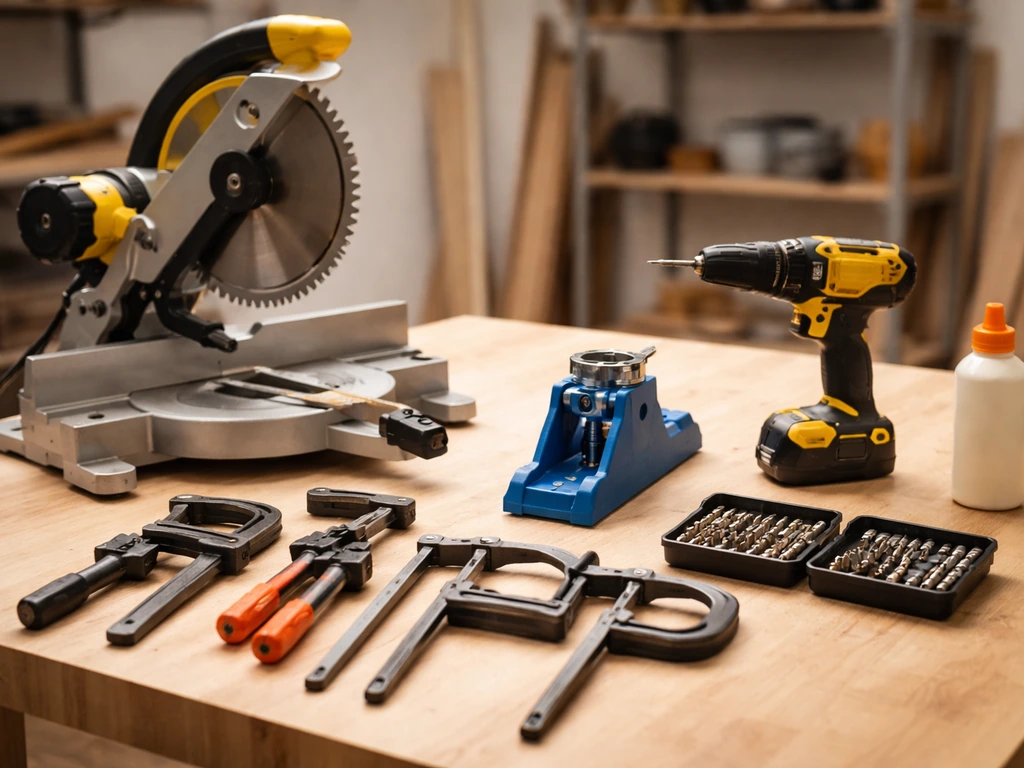
You don't need a full woodshop to build good patio furniture. Here's what you actually need to get through a standard chair or table build. If you're missing a tool, most home centers rent them by the day for $25–$50.
- Miter saw (preferred) or circular saw — a miter saw is strongly recommended for repeatable, accurate crosscuts; circular saw accuracy depends more on your technique and a steady hand
- Drill/driver — cordless, at least 18V
- Impact driver — helpful for driving long exterior screws, but keep the clutch low to avoid over-driving
- Kreg pocket-hole jig (optional but excellent for clean, strong joinery)
- Tape measure and speed square
- Clamps — at least 4 medium bar clamps
- Sandpaper — 80-grit for rough prep, 120-grit and 150-grit for finishing
- Safety glasses and hearing protection
- Exterior-rated wood glue (Titebond III or similar)
- Paintbrush or foam applicator for sealer
- Drop cloth
- Pencil and marking knife for cut lines
- Stainless steel or HDG screws (2-inch and 3-inch lengths cover most applications)
- Stainless pocket-hole screws if using a jig (1-1/4 inch for 3/4-inch material)
The step-by-step build: cut list, assembly, and weatherproofing prep
I'll walk through a simple Adirondack-style chair as the example build since it covers most of the skills you'll use for any patio furniture project. The same process applies whether you're building a bench, a side table, or going bigger with a dining set. If you want to expand from a single chair to a complete patio set, the workflow scales directly from what's here.
Step 1: Create your cut list
A cut list is just a written inventory of every piece you need before you touch the saw. Work from a plan (Kreg Tool offers a free Adirondack chair plan download that includes a detailed cut list), then adapt dimensions to your space if needed. A basic Adirondack chair cut list built from 2x4 and 1x6 cedar or pressure-treated stock includes pieces like two front legs at 18-1/2 inches, two rear legs/back supports, seat slats, back slats, and arm rests. Write down every piece, its dimensions, and how many you need. Group pieces by size to minimize waste when cutting from full boards.
Step 2: Cut your parts
Set up your miter saw and make a test cut on scrap to confirm your angles are dialed in. For square crosscuts, set the bevel and miter both to zero. Mark each piece with a pencil before cutting. Cut all identical pieces in sequence without resetting the saw between them. This is where a miter saw earns its place: it holds the angle consistently so every piece comes out the same length. A circular saw works, but you'll need a clamped straightedge guide for repeatability. Label each cut piece as you go.
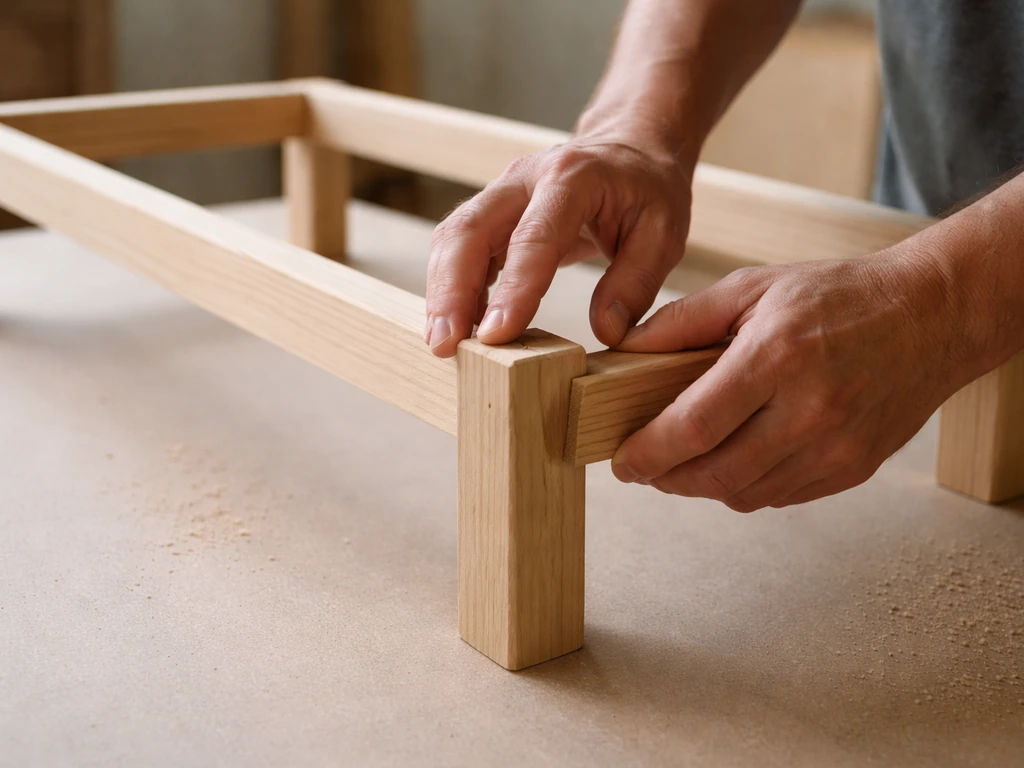
Step 3: Dry-fit before you commit
Before driving a single screw, lay all your pieces out and assemble the whole piece without fasteners. This is the step most beginners skip and then regret. Dry-fitting reveals misaligned pieces, cuts that came out slightly short, and assembly sequences that won't work once glue is involved. Clamp everything loosely and eyeball for square. Use a speed square to check corners. Fix problems at this stage and you'll save yourself a frustrating tear-down later.
Step 4: Assemble with glue and screws
Apply a thin, even layer of exterior wood glue to mating surfaces, clamp the joint together, then drive your fasteners. If you're using a pocket-hole jig, set the drill bit stop collar to the etched marking for your workpiece thickness before drilling. This prevents over-drilling, which weakens the joint. When driving pocket-hole screws with a drill or impact driver, set the clutch low enough that the screw seats snugly without stripping the pocket or over-compressing the wood. Drive screws perpendicular to the surface and snug them, don't crank them until the wood compresses. Work in sub-assemblies: build the seat frame, then add legs, then attach the back. Let glue cure with clamps on for at least 30–60 minutes before moving to the next stage.
Step 5: Spacing slats correctly
If your design includes seat or back slats, spacing matters for both drainage and appearance. A gap of 1/8 to 1/4 inch between slats is the right range. Too tight and water pools between them and rots the wood from the inside. Too wide and cushions sink in and the aesthetic falls apart. Use a spare piece of 1/4-inch scrap as a spacer and move it between slats as you fasten each one for perfectly consistent gaps.
Step 6: Sand everything before finishing
Sand all surfaces before you apply any sealer. Start with 80-grit to knock down any rough spots, mill marks, or dried glue squeeze-out, then move to 120-grit for a smoother finish. Pay extra attention to edges and end grain, these absorb water fastest and need to be clean and open to take the sealer properly. Wipe down with a tack cloth or a slightly damp rag and let the wood dry completely. Don't apply finish over a damp surface, the coating will fail to bond.
Finishing, sealing, and protecting against moisture and UV
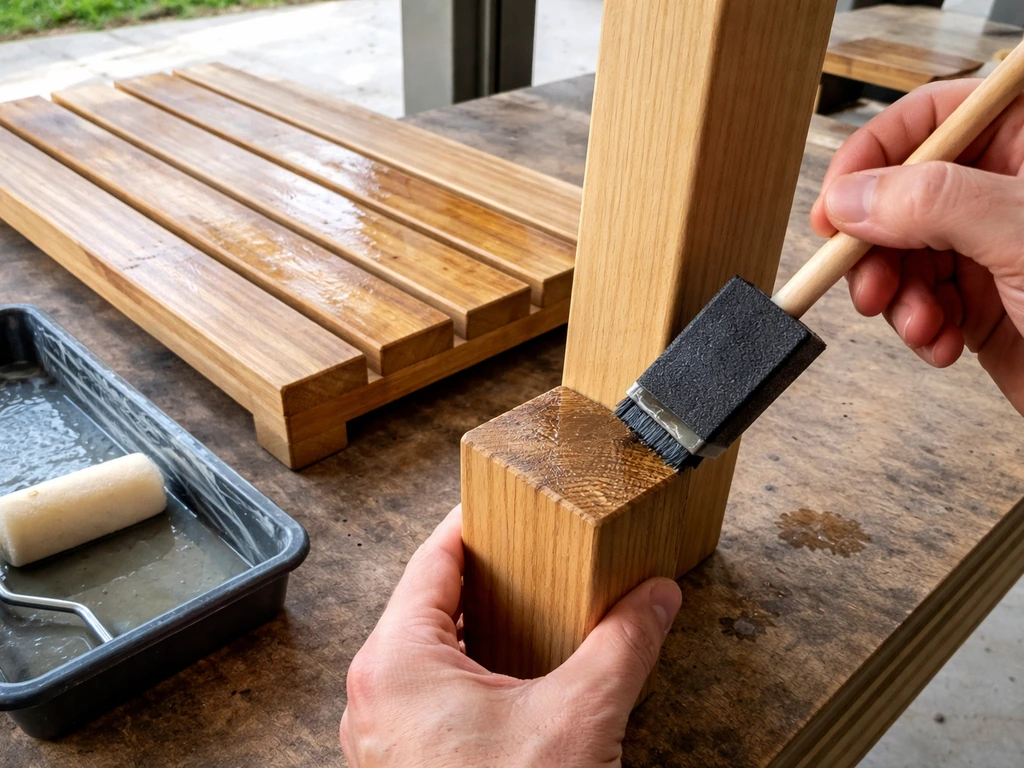
This step is what separates furniture that lasts five years from furniture that lasts fifteen. Here's the order that actually works.
- Seal end grain and leg bottoms first. These are the highest-absorption zones and will drink sealer faster than flat surfaces. Apply a penetrating exterior oil or sealer to all cut ends, leg bottoms, and slat tips. Let it soak in for 10–15 minutes, then wipe off any excess so it doesn't cure tacky.
- Apply your base coat of spar urethane or exterior sealer to all surfaces. Work with the grain using a quality brush or foam applicator. Get into every crevice around fastener heads and slat gaps.
- Allow proper dry time before recoating. For oil-based spar urethane like Olympic, allow at least 4 hours between coats. Varathane Ultimate Spar Urethane instructs you to recoat only when the previous coat has dried clear and feels hard, not just surface-dry. For products like Thompson's WaterSeal, allow at least 48 hours of drying time.
- Apply a second coat. Two coats minimum on any outdoor piece. Three coats on anything that will sit in direct sun or rain exposure year-round.
- Apply only during dry weather. The surface needs to be dry and the forecast should be clear for at least 24–48 hours after your final coat. Moisture trapped under a sealer coat causes blistering and peeling.
- Let cure fully before use. Plan on 24 hours minimum before putting the furniture into service, and avoid heavy use or placing cushions on it for 48–72 hours.
| Product Type | Recoat Timing | Full Dry/Cure | Best For |
|---|---|---|---|
| Oil-based spar urethane (Olympic) | 4 hours between coats | 24 hours before use | Tabletops, arms, high-contact surfaces |
| Varathane Ultimate Spar Urethane | When previous coat is clear and hard | 24 hours before use | UV protection, all outdoor surfaces |
| Thompson's WaterSeal Clear Sealer | 48 hours minimum dry time | 30 days before oil-based paint over it | Penetrating base seal, leg bottoms, end grain |
| Ready Seal penetrating oil | 45 minutes between coats | 48–72 hours full dry | Cedar, redwood, high-absorption surfaces |
After sealing, pay attention to what the manufacturer calls moisture danger zones: seat slat surfaces, arm fronts, back slat tops, leg bottoms, and any horizontal ledge where water can sit after rain. Adirondack Street recommends sealing high-absorption areas first, like end grain and leg bottoms, and then applying a penetrating exterior oil or wood sealer to saturate the fibers, wiping off excess to avoid tackiness moisture danger zones: seat slat surfaces, arm fronts, back slat tops, leg bottoms. These spots need the most thorough coating coverage and will be the first places you'll want to touch up in future seasons.
Troubleshooting common DIY problems
Wobbly furniture
Wobble almost always comes from one of three causes: loose fasteners, legs that aren't cut to identical lengths, or a frame that racked out of square during assembly. Start by checking and re-tightening all bolts and screws in sequence, working from one end to the other rather than randomly. Then check whether all four legs contact the ground evenly. If one leg is slightly short, a furniture pad can compensate. If the frame itself is racked (twisted), you need diagonal bracing. A simple cross-brace of 1x3 lumber fastened at 45 degrees across the back frame will prevent racking and is worth adding to any design that doesn't already include it. Make it a habit to do a fastener check and tighten-up about once per quarter during the outdoor season.
Warped boards
Warp happens when one face of a board dries faster or absorbs more moisture than the other. Prevention is mostly in the sealing step: if you seal all six faces of every board (including the hidden undersides of slats), you reduce the moisture differential that causes cupping. If you're buying lumber, pick straight boards at the store and store them flat and elevated off the ground until you're ready to build. For mild warp in an installed slat, pre-drilling and driving a fastener at the center of the slat while pressing it flat can pull it back into alignment. Deep warp or boards that have gone spongy are not worth trying to save.
Fastener failures and splitting
Screws backing out or stripping usually mean you drove them with too much torque or into undersized pilot holes. Always pre-drill near board ends, the wood is much more likely to split there. If you're re-driving a screw into an old hole that's stripped, fill the hole with a wooden toothpick and exterior wood glue, let it dry, then re-drive. Repeated splitting at the same location, or wood ends that crumble when you press them with a fingernail, are signs of rot. At that point, replacement is the right answer, not repair.
Peeling or bubbling finish
This almost always traces back to applying finish over a damp or dirty surface. Before any refinishing, strip the failing coat using 80-grit sandpaper or a finish stripper, clean the surface thoroughly, let it dry completely (ideally two dry days in a row), then reapply. Never skip the cleaning step. Sealer applied over dirt just floats on top instead of bonding, and you'll be stripping and redoing it the following season.
Keeping it in good shape season after season
Building it is only half the job. If you plan to make patio furniture out of pallets, the same finishing and seasonal maintenance habits will help your pieces resist rot and keep looking great Building it is only half the job.. The reason most DIY outdoor furniture doesn't last isn't poor construction, it's poor seasonal habits. Here's what actually makes the difference over the long run.
During the season
- Inspect and tighten all fasteners at the start of the season and once mid-season
- Rinse off pollen, bird droppings, and debris with a garden hose every few weeks
- Touch up any areas where the finish has worn thin, especially on horizontal surfaces, arm tops, and seat slats
- Never leave cushions wet or sitting on bare wood for extended periods
End-of-season storage and covering
Before you put furniture away for winter or cover it for the off-season, clean it thoroughly and let it dry completely. Storing damp furniture under a cover is one of the fastest ways to grow mold and accelerate rot. If you're covering pieces in place, use breathable waterproof covers rather than solid plastic tarps. Solid plastic traps condensation underneath, and you'll lift the cover in spring to find mold and surface damage. Breathable covers allow air circulation while keeping rain and debris off.
If you're storing pieces in a garage or shed, elevate them off the concrete using wood scraps or furniture risers. Never store wooden furniture directly on soil or grass, even indoors. Moisture wicks up from ground contact and the problem is compounded if there's any termite activity in the area. The same rule applies on the patio during the season: if your furniture sits on soil or grass rather than a hard surface, put it on rubber feet, plastic glides, or small treated-wood platforms to create airflow underneath.
Annual refinishing schedule
Plan on a light sand and fresh topcoat every one to two years for pieces in full sun and rain exposure. Sand with 80-grit to scuff the existing finish and remove any gray weathering, then clean, let dry, and apply one fresh coat of spar urethane or your original sealer. This takes maybe two hours per piece and extends the life dramatically. Pieces that stay under a pergola or covered patio can often go three years between refinishes. This is also a good time to inspect for any rot, loose joints, or fasteners that need replacement before they become a bigger problem.
FAQ
What’s the best way to choose a wood thickness if I’m not following an exact plan?
Match thickness to the hardware and joint method. For pocket holes, use stock thickness that matches your jig settings (commonly 3/4-inch for 1-1/4-inch screws), and keep all slats the same thickness to maintain even gaps and prevent rocking.
Can I use pressure-treated lumber and a clear sealer immediately after cutting?
Let fresh-cut ends dry before finishing. Pressure-treated boards often have surface moisture, and sealing wet wood can trap water under the coating, leading to early peeling. If you can, seal after cutting once the moisture has flashed off and the surface feels dry to the touch.
How do I prevent rust stains from touching my patio concrete or pavers?
Use fully compatible outdoor fasteners and keep metal heads sealed. If you use hot-dipped galvanized, keep all galvanized fasteners consistent in that joint, and apply sealer to fastener heads so any exposed metal is less likely to wick moisture and stain nearby surfaces.
Is it okay to mount patio furniture directly to a deck or wall?
Often it’s safer to keep it freestanding unless the plan specifies a mounting method. If you do anchor it, pre-drill and leave room for wood movement (do not fully clamp rigidly across long runs), and ensure the mounting hardware is rated for exterior wet exposure.
How much weight should a beginner expect an Adirondack-style chair to handle, and how do I build for it?
Build for stability first, not just comfort. Keep leg lengths consistent, add diagonal bracing if your design doesn’t already include it, and do a dry-fit check for square before gluing, because racking is what usually leads to premature looseness under load.
What’s the right way to space seat slats if my slats are wider than the plan assumes?
Use the same gap rule in relation to water drainage, target 1/8 to 1/4 inch between slats, then adjust the number of slats to keep overall seat width. If you increase slat thickness, verify you still have clearance for the back angle and that slats do not create a pinch point on the frame.
My joints look tight in the dry fit, but after adding glue they pull out of alignment. What should I do?
Use sub-assembly first and control clamp pressure. Glue can shift pieces while clamping, so clamp in the same order each time, check square immediately after clamping (speed square helps), and wipe squeeze-out before it cures to make sanding and finishing easier.
How many coats of spar urethane or oil-based sealer should I apply for outdoor durability?
Plan on at least two coats for full protection, with extra attention to moisture danger zones like leg bottoms and horizontal ledges. Let the first coat fully dry before sanding lightly (120 grit) if the surface feels rough, then apply the final coat.
What should I do if my furniture developed a small wobble after the first season?
Re-tighten systematically and check leg contact before assuming parts are bent. Start by tightening fasteners in order from one end to the other, then confirm all legs touch the ground evenly; if one leg is short, fix it with a pad or shim, but if the frame is racked, add or upgrade diagonal bracing.
Can I store patio furniture outside during winter if I use a cover?
You can reduce exposure, but don’t trap moisture. Use breathable waterproof covers, ensure furniture is clean and fully dry before covering, and avoid solid tarps that create condensation. If possible, elevate pieces off the ground to improve airflow underneath.
What’s the safest way to do touch-ups between full refinishes?
Spot-sand only the affected area (start around 80 grit if peeling is present, then feather edges), clean thoroughly, let dry completely, then apply a thin topcoat over the repaired zone. Pay extra attention to end grain and any place where the finish has worn through, because water intrusion starts there.
Are pallet-wood patio builds treated the same way as regular lumber for finishing and maintenance?
Finishing routines are similar, but you must be more selective with pallet wood. Pallets can be contaminated and may have unknown treatments, so inspect for stamp codes and damaged boards, then seal all faces and keep an aggressive maintenance schedule because pallet boards may have more variable moisture content.