Start by measuring your patio, marking your walkways, and placing your largest piece first. That's the core method. Everything else, chair spacing, rug size, umbrella placement, grows outward from those three decisions. Most people skip the measuring step and end up with a layout that looks cramped, blocks a door, or makes it impossible to clean under the table. Do the measurements first and the rest falls into place faster than you'd expect.
How to Organize Patio Furniture: Layouts, Spacing, Flow

Maren Grady
13 May 2026
Measure your patio before you move a single piece
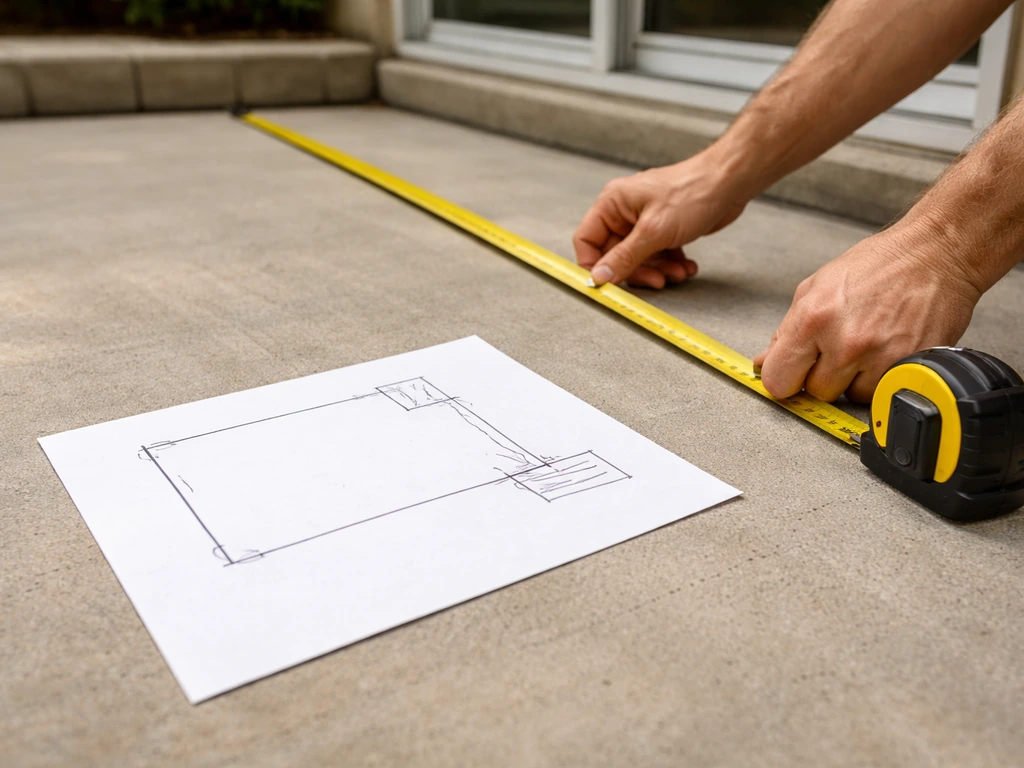
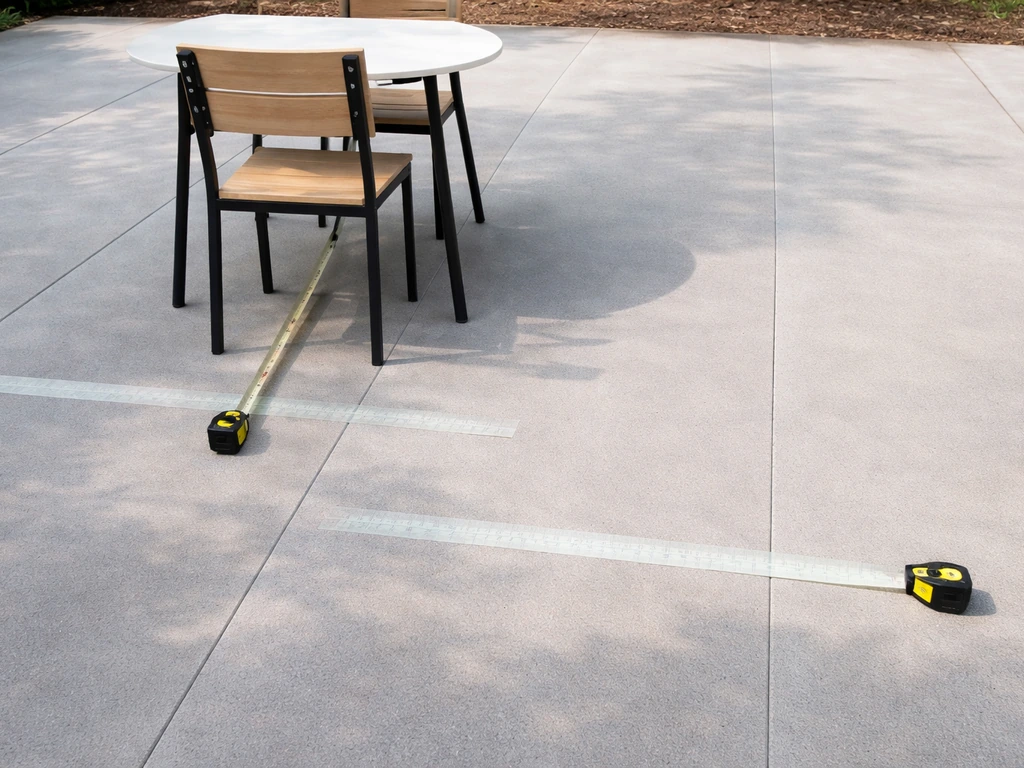
Pull out a tape measure and get the actual dimensions of your patio. Write them down. Sketch a rough rectangle or L-shape on paper and note where the door is, where the steps are, and where the house wall or fence runs. These are your hard constraints and they matter more than anything else in your layout.
The two numbers you need to protect are your exit paths and your pedestrian clearance. Any path someone walks regularly, from the back door to the yard, from the grill to the table, needs to stay at least 36 inches wide so two people can pass without squeezing. If your patio is small and that feels tight, bump it to 44 inches on the main traffic lane so you're not bumping chairs every time you carry plates.
Note the shape of your space too. A square patio naturally lends itself to a centered dining table or a round conversation cluster. A long, narrow rectangle almost always works better split into two zones end-to-end. An L-shaped patio is a gift because you can tuck a lounge area around the corner and keep your dining zone in the main section without either competing for space.
- Measure total length and width (or each section if it's an L-shape)
- Mark every door, step, and gate on your sketch
- Mark any fixed features: outdoor outlets, spigots, built-in grill, pergola posts
- Draw dotted lines for the paths people walk daily — these are sacred, don't block them
- Note which direction faces the sun in the afternoon if shade matters to you
One trick I keep coming back to: use painter's tape on the actual patio surface to outline where you're thinking of putting major pieces before you drag anything out. Mark the table footprint, the chairs, the sofa. Then walk every path at a full stride and see if anything catches your hip or forces you to turn sideways. It takes ten minutes and it will save you from rearranging 80-pound pieces twice.
Pick your zones before you pick your arrangement
Every patio works better when you decide upfront what it's for. The three most common zones are dining, lounging, and conversation. You don't have to pick just one, but you do need to decide which is the priority and how much space each gets. A lot of layout problems come from trying to squeeze all three into a 10x12 patio without making any hard calls.
Dining zone
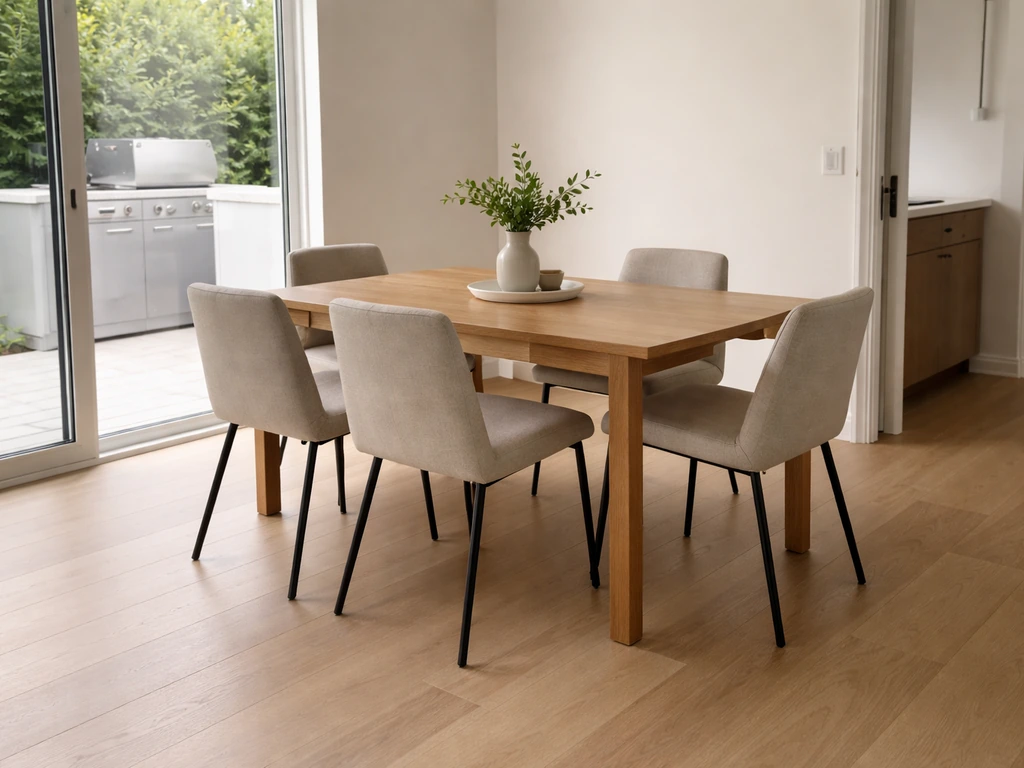
This is a table and chairs you actually sit at for meals. It needs to be close to the kitchen door or grill so food isn't traveling 30 feet. It also needs the most clearance of any zone because chairs get pushed back hard when people stand up. Plan at least 36 inches from the table edge to any wall, railing, or furniture behind the chairs. If someone will be serving food and walking behind seated guests, bump that to 44-48 inches so they don't have to squeeze past.
Lounge zone
This is the cushioned sofa or chaise setup where people recline rather than sit upright. It works best with its back against a wall or railing so it doesn't feel like floating furniture in the middle of a space. Lounge zones are usually lower priority for traffic flow since people go there to stay put, but make sure you can still reach the cushions easily for cleaning or swapping covers.
Conversation zone

This is two to four chairs or a sectional arranged facing each other, usually around a coffee table or fire pit. The key spacing rule here: seated people should be roughly 6 to 8 feet apart for comfortable conversation, close enough to talk without raising your voice, far enough that nobody feels crowded. If you're building around a fire pit, keep chairs at least 2 to 3 feet from the edge of a gas fire pit and 3 to 4 feet from a wood-burning one. The whole fire pit area should also have 10 feet of clear buffer around it from any structures, fences, or overhanging branches.
Proven arrangement options and when to use each
There's no single right layout, but there are a handful of arrangements that work reliably in most residential patios. Here's how to match the layout to your space and how you actually use it.
| Layout Type | Best For | Key Advantage | Watch Out For |
|---|---|---|---|
| Centered dining table | Square or slightly rectangular patios | Equal clearance on all sides, easy to walk around | Needs at least a 12x12 patio to feel open with 6-chair table |
| Conversation cluster (chairs facing in) | Smaller patios, fire pit setups | Cozy and focused, works in a 10x10 space | Can block traffic if not tucked to one side |
| L-shaped sectional | L-shaped or large rectangular patios | Defines the zone without extra furniture | Needs 3-4 feet clearance on open sides to avoid cramped feel |
| Split-zone (dining one end, lounge other) | Long rectangular patios | Each zone has dedicated space, clear separation | Middle can become a dead zone if not anchored with a rug or path |
| Back-to-wall dining + facing lounge | Medium rectangular patio with a view | Maximizes open center, easy traffic flow | Lounge faces dining which can feel awkward without a divider |
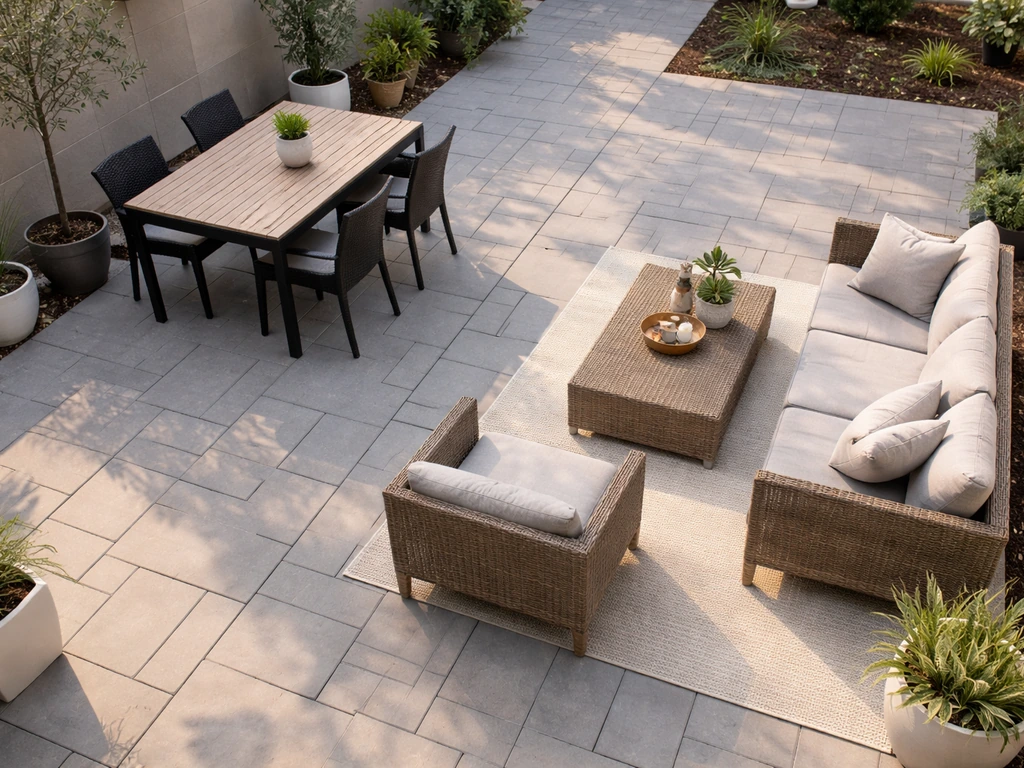
The split-zone layout is the one I reach for most often in standard suburban backyards. Put the dining table near the door or grill, keep the lounging area toward the yard end, and leave the center open. It creates a natural flow from the house out to the yard without any furniture blocking the path.
For a sectional, always place the long back piece against a wall or railing first, then angle the return piece into the space. Floating a sectional in the middle of a patio almost never works unless you have a very large space because it blocks traffic from every direction.
Clearance rules that actually matter (and exact numbers to use)
This is the section most layout guides skip, and it's the one that makes or breaks a patio. Here are the clearances worth memorizing.
- 36 inches minimum behind every dining chair — this is the distance from the back of the chair (when pushed in) to the nearest wall, fence, or piece of furniture. It gives someone room to push back and stand without hitting anything.
- 44 to 48 inches on any path used for serving food or carrying items — if someone will be walking behind seated guests with plates, that extra 8 to 12 inches matters more than you'd think.
- 36 inches minimum between table edge and any fixed obstruction on the side — this allows a chair to pull out sideways if needed.
- 2 to 3 feet from chairs to gas fire pit edge, 3 to 4 feet from chairs to wood-burning fire pit edge — and keep the whole fire pit area clear for 10 feet from structures.
- Umbrella base placement: the base and any weighted stand cannot extend into your main walking path. If you're tight on space, a wall-mount or offset umbrella keeps the base out of foot traffic entirely.
Grill access is one people always forget. If you have a freestanding grill, you need at least 3 feet of clear space on the sides for the cook to move and for opening the lid without backing into a chair. Positioning the grill so it's accessible from two sides is even better, especially if multiple people tend to congregate around it. A linear layout along a wall or fence edge works well here because it keeps the grill zone separate from the main seating without pinching traffic.
How to make the layout feel intentional, not just functional
Once your clearances are right and the furniture is placed, three things turn a functional layout into one that actually looks pulled together: a focal point, intentional sight lines, and an anchoring rug.
Pick one focal point and orient toward it
A focal point gives the layout a reason. It's usually the fire pit, a nice view, an outdoor TV, or even a statement planter. Orient the main seating so people face it naturally. For a dining table, this usually means making sure guests seated at the table have the pleasant view rather than looking at the house wall. For a conversation cluster, position chairs so they face the fire pit or focal element instead of facing the fence.
Use a rug to anchor each zone
An outdoor rug does two things: it defines the zone visually and it signals where the furniture grouping starts and ends. For a dining area, the rug should be large enough that chair legs stay on the rug even when someone pulls the chair out to sit down. A practical starting point is to extend the rug about 24 inches beyond all four edges of the table. For a conversation cluster or lounge zone, at minimum the front legs of every seating piece should rest on the rug. All legs on the rug looks more intentional if the rug is big enough.
One important thing: make sure the rug doesn't shrink your walking paths. If putting a rug in a zone means someone has to step off it every time they walk by, go up a size or reposition the furniture slightly so the rug edge falls at a natural transition point rather than mid-path.
Sight lines for conversation
In a conversation zone, every seat should have a direct line of sight to every other seat. This sounds obvious but gets broken quickly when someone adds a coffee table that's too tall, a side table that cuts the sightline, or positions one chair at an angle facing slightly away from the group. Do a quick check: sit in each chair and confirm you can easily make eye contact with everyone else in the cluster without turning your head more than about 45 degrees.
What to do when your layout isn't working
Even a well-planned layout sometimes needs a second pass after you've actually used it for a week. Here's a quick checklist to diagnose the most common problems. Once your layout makes sense, you can use it as a checklist to help you figure out how to buy patio furniture that will fit your space and traffic flow.
- Someone always has to turn sideways to get to the table: your serving path is under 36 inches, pull the table away from the wall or fence by 6 to 12 inches
- Chairs feel cramped or keep scraping the wall: add clearance behind chairs, remove one chair if the table is too large for the space
- The layout looks random or unanchored: add a rug, or push furniture closer together so groupings are tighter and more intentional
- The grill or fire pit feels like an island people walk around awkwardly: check if seating is too close or angled wrong — reorient chairs toward the focal piece
- One section of the patio always feels unused: it likely lacks a defined purpose or furniture, try adding a small side table and two chairs to create a secondary zone
- Umbrella keeps getting knocked or blown over: move it so the base sits entirely within the furniture grouping, not on a walking edge
- The space looks fine but feels boring: lower the coffee table, add a plant or lantern at the corner of the rug, or rotate the whole layout 45 degrees if the patio shape allows it
If you're still not happy after adjustments, go back to the painter's tape method. Tape out three completely different arrangements on the patio surface before moving furniture again. Walk each one at full stride and see which one flows naturally. It's a lot easier to erase tape than to drag a sectional twice.
Arrange for easy maintenance while you're at it
Here's the thing most layout guides never mention: the way you arrange furniture now directly affects how annoying it is to maintain. A few small decisions at arrangement time will save you real time every season.
Leave enough clearance around and under tables to actually clean. If you can't fit a mop or hose under the table without moving chairs, you won't clean under it as often as you should, and that's where mold and staining build up fastest. At minimum, a standard patio broom needs about 12 to 18 inches of clearance to sweep under table edges.
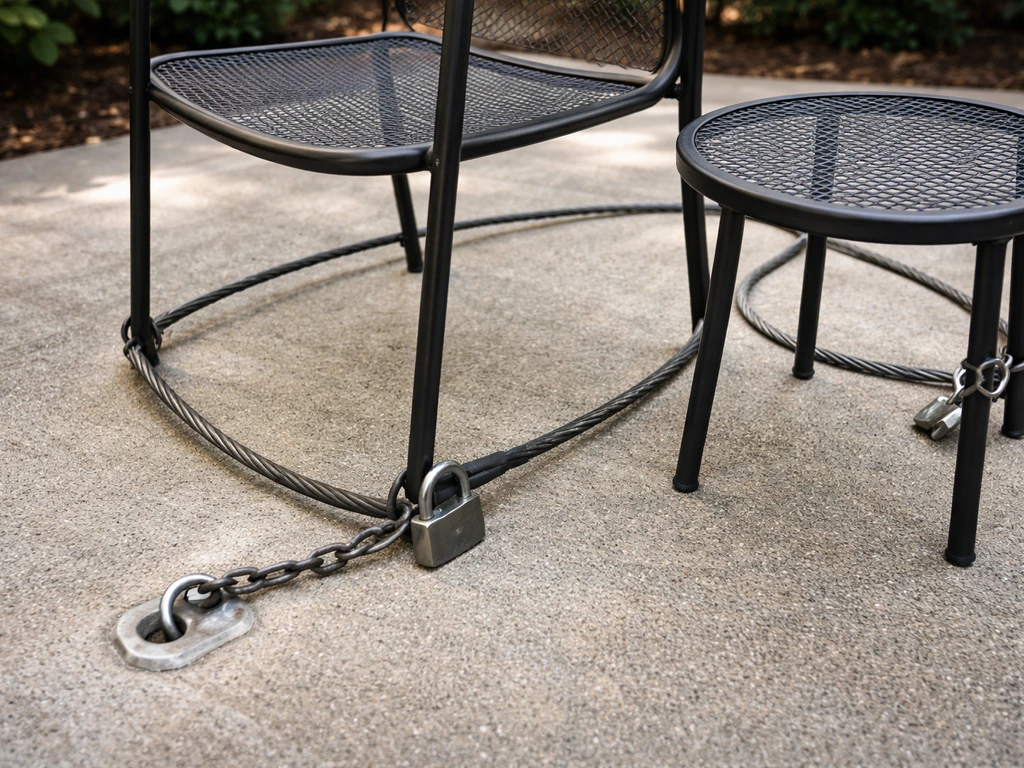
Think about cover access when you place pieces. When you go to put covers on at the end of the season or before a storm, you need to be able to get around all four sides of a table and all around a chair without the piece being jammed against a wall. Wayfair also recommends measuring your table across the widest part and then comparing those dimensions to the cover size chart before you buy an outdoor furniture cover get around all four sides of a table. Covers need to go on when the furniture is completely dry, so the furniture also shouldn't be in a low spot where water pools. If you're covering a piece that's flush against a wall, you can't get the cover over the back without a fight, and a tight-fitting cover can actually damage the furniture if it's forced.
If you stack chairs for storage, the stacking position should be part of your layout plan, not an afterthought. Decide now where the stack will live when chairs are put away, and make sure that spot doesn't block the door or a path. Stackable chairs against the house wall or in a corner work well. Knowing this in advance also helps you choose the right chair count for your table, since four stackable chairs take up far less space than six non-stackable ones when you're trying to tuck them away for winter.
One last thing: if you're setting up a new patio from scratch, take a look at how your layout connects to how you plan to actually set up and use the space day-to-day, including whether you want it to live on grass or hard surface, and how you'll route people from the house to the seating. Those decisions intersect more than people expect and getting them right together saves a lot of backtracking.
FAQ
How much clearance do I need if my patio is tight and I still want a dining and lounge area?
Start by protecting your main traffic lane, then treat the rest as “zone compromises.” If you cannot fit 36 inches everywhere, keep the tighter spacing only in the non-primary lanes, and make sure chair backs do not block the door swing or the route from the grill. Also consider using a bench or armless chairs for the lounge so you can pull seating back without reducing the walkway width.
What’s the easiest way to place a rug when I have an irregular patio shape (like an L-shape or angled section)?
Use the rug to unify the zone, not to match the patio edges. Tape out the dining or conversation footprint first, then choose a rug that covers the key movement area, for dining that means at least chair legs remain on the rug when pulled out. For L-shapes, it often helps to keep the rug aligned to the main table run, then let the rug edge break across the corner transition instead of trying to “corner” it precisely.
Should I buy patio furniture based on where it fits, or based on how it performs (heat, wind, cleaning)?
Fit matters, but performance catches issues later. If wind is common, place heavy seating and tables where they are least likely to sway into walkways, then confirm umbrellas do not collide with chairs when opened. For cleaning, prioritize layouts that leave straight access beneath and around tables, and avoid positioning the conversation cluster so side tables block sightlines and also make sweeping between pieces harder.
How do I handle an outdoor dining setup when my grill is close to the table?
Treat it as a two-zone problem: food movement and guest movement. Keep the cooking side clear, ideally with access from two sides if multiple people gather there. Then ensure there is a dedicated route for plates from grill to table that does not require guests to stand or turn sideways to let someone pass behind them.
What if my chairs can’t all fit 6 to 8 feet apart for conversation, but I still want comfortable talk?
You can relax the “range” by adjusting the layout type. Try fewer seats clustered closer with a lower coffee table, and use chairs with arms or slimmer profiles so the group still feels open. If you add a second table or tall side table, remove it, because it can destroy the direct sightline rule even when spacing looks acceptable.
How do I choose between a round dining table and a rectangular one for organizing patio furniture?
If your patio is square or you want a smoother circulation pattern, a round table often reduces “dead corners” and can keep the exit paths cleaner. For long, narrow patios, rectangular tables usually distribute space better because you can align the long side with the patio and create a clearer end-to-end flow between zones.
What should I do if my outdoor furniture blocks the cover access or makes putting covers on miserable?
Reposition early, before you commit to a final layout. Aim for cover clearance on all four table sides and around chairs, and avoid tight “flush against wall” placements that prevent covers from sliding over the back. If you cannot create clearance, switch to furniture styles with covers that open from the top or use a different storage arrangement, like moving pieces into a corner staging spot when not in use.
Can I keep chairs stacked for storage without sacrificing my patio layout?
Yes, but the storage spot must be planned like another piece of furniture. Choose a location that is out of the main door-to-yard route, then confirm you can still reach covers and clean paths. Also account for the storage footprint differences, four stackable chairs usually save space compared with six non-stackable chairs, so your winter layout may need to assume different chair counts.
How can I prevent maintenance problems like mold growth under the table?
Design for airflow and access, not just appearance. Make sure you can sweep underneath with a broom sized for your setup, and avoid layouts where a table overhang or chair cluster traps debris. If your patio has low spots where water pools, keep seating slightly higher where possible or place items so cushions and covers can dry completely before storage.
What should I check after moving furniture once the patio is in use for a week?
Run a “real circulation” test. Watch where you and guests naturally walk, then compare it to your planned pathways, confirm nobody routinely squeezes around chair arms, and check that chairs do not end up pushed into the walkway when people stand. Also re-test sightlines while seated, because small changes like adding a new side table can break the eye-contact rule.